Advertisement
Auto-GPT is one of those projects that sounds wild the first time you hear about it—an AI agent that writes its own tasks, makes decisions, uses tools, and works toward goals you give it. It runs on top of OpenAI’s GPT models but can do more than just answer questions. It chains thoughts, calls APIs, searches the web, writes code, and updates itself. But if you’re running Ubuntu and not too deep into Python or virtual environments, setting it up can feel like solving a puzzle with half the pieces missing.
That's where this guide helps. We're not going to throw jargon at you or assume you've set up five different Docker containers before breakfast. You'll find a clear breakdown of the tools people are using to run Auto-GPT on Ubuntu, as well as a step-by-step walkthrough using the most reliable one. The goal is to get you from download to working agent, with no guesswork.
Auto-GPT is built with Python, and version 3.10 or above is needed. Ubuntu often ships with an older version, so you might need to install it manually. This version helps avoid compatibility issues with certain dependencies in Auto-GPT.
pip handles installing everything Auto-GPT depends on. You’ll use it to install libraries like openai, requests, colorama, and pydantic. It comes bundled with newer Python versions, but you can add it separately if needed.

Git lets you clone the Auto-GPT repository from GitHub. It's a basic tool in most development setups. On Ubuntu, it's usually already installed, but if not, it only takes one command.
While not required, a code editor like VS Code makes it easier to tweak config files and debug problems. You’ll need to update .env files, and doing it in a clean editor saves time.
Auto-GPT can’t run without access to GPT models. You’ll need an OpenAI API key, which you can generate from your account dashboard at platform.openai.com. Keep it safe—it links directly to your billing.
Auto-GPT uses Pinecone for memory storage. You’ll need it if you want long-term memory or vector search capabilities. Without it, Auto-GPT will forget its own actions once the script restarts.
Some people prefer running Auto-GPT inside Docker containers. It's a way to isolate the environment and avoid library version clashes. If you know Docker, it might simplify things, but it's not required for most setups.
If you're setting up memory storage in a more advanced way, Redis can be used as a backend. It’s fast, simple to run, and fits right into Auto-GPT’s architecture for memory.
This is where all the code lives. You’ll clone this repository to your local machine. It’s regularly updated, so if something breaks, checking the issues tab on GitHub usually gives you answers.
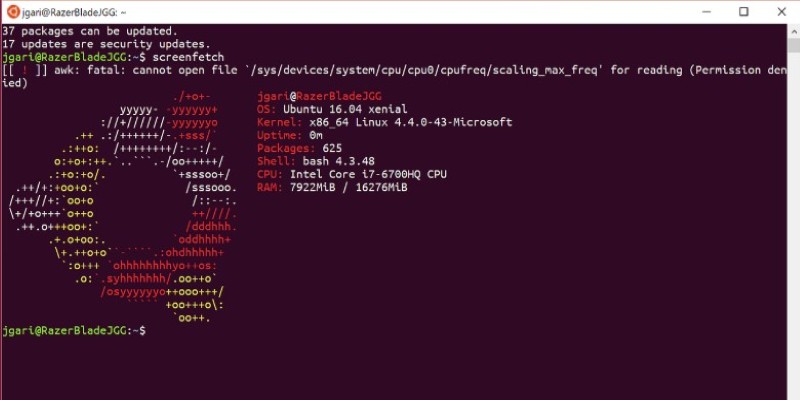
The good old terminal is all you need. Every setup step—from installing Python to running the Auto-GPT agent—happens in this black-and-white window. No fancy interface, just commands.
Let’s walk through the full process of installing and running Auto-GPT on Ubuntu without Docker. We’ll use Python as the main setup method—it’s the most straightforward and works for most users.
First, check if your Python version is already 3.10 or higher:
bash
python3 --version
If it’s not, you can install it using:
bash
sudo add-apt-repository ppa:deadsnakes/ppa
sudo apt update
sudo apt install python3.10 python3.10-venv python3.10-dev
Now set it as default (optional):
bash
sudo update-alternatives --install /usr/bin/python3 python3 /usr/bin/python3.10 1
Install pip:
bash
sudo apt install python3-pip
Navigate to where you want the folder, then run:
bash
git clone https://github.com/Torantulino/Auto-GPT.git
cd Auto-GPT
Create a virtual environment (recommended):
bash
python3 -m venv venv
source venv/bin/activate
Inside the project folder, install all dependencies:
bash
pip install -r requirements.txt
Copy the example environment file:
bash
cp .env.template .env
Open .env with your editor and paste your OpenAI API key in the OPENAI_API_KEY field. If you're using Pinecone or other services, add those keys too.
Once your .env is set up and packages are installed:
bash
python scripts/main.py
Auto-GPT will now prompt you to name your AI and give it a role. From there, it begins its self-directed task loops.
Setting up Auto-GPT on Ubuntu is a lot simpler than it sounds when you strip away all the buzzwords and focus on what actually needs to be done. You need Python, pip, the project files, and an OpenAI API key. Everything else—like Pinecone, Redis, or Docker—is extra and depends on how deep you want to go.
This setup will get a basic Auto-GPT instance running on your machine, ready to take instructions and work toward your defined goals. You can always expand it later once you're comfortable. Whether you're testing AI automation or building a more serious tool, starting with this local setup gives you full control without unnecessary layers.
Advertisement

Discover how deep learning and neural networks reshape business with smarter decisions, efficiency, innovation, and more
How to use Python logging the right way. This guide covers setting up loggers, choosing levels, using handlers, and working with the logging module for better debugging and cleaner code tracking

Explore core concepts of artificial neural network modeling and know how neural networks in AI systems power real‑world solutions

Trying to choose between ChatGPT and Google Bard? See how they compare for writing, research, real-time updates, and daily tasks—with clear pros and cons

Need to filter your DataFrame without writing complex code? Learn how pandas lets you pick the rows you want using simple, flexible techniques

Curious about OLA Krutrim? Learn how to use this AI tool for writing, summarizing, and translating in multiple Indian languages with ease

Top AI hardware vendors join forces to compete with Nvidia and reshape the AI infrastructure market.

Learn about fintech’s AI challenges: explainability gaps, synthetic identity fraud, compliance requirements, and others.

Learn the basics of Physical AI, how it's different from traditional AI, and why it's the future of smart machines.

Discover how a steel producer uses AI to cut costs, improve quality, boost efficiency, and reduce downtime in manufacturing

Need smarter workflows in Google Sheets? Learn how to use GPT for Sheets and Docs to write, edit, summarize, and automate text with simple AI formulas

Looking to edit music like a pro without being a composer? Discover Adobe’s Project Music GenAI Control, a tool that lets you create and tweak music tracks with simple commands and no re-rendering required